欢迎大家参加我们的NodeHub 开发者研习会,我们的活动分为两场,欢迎线上线下的小伙伴们一起参与进来!
线上线下的同学完成案例之后,欢迎在帖子上留言,带上课程活动的效果截图,月底我们会根据点赞数对排名前五位点赞数的同学进行礼物发放。
PC 密码: work-123
案例一:手势控制仿生机器人
步骤一:设备连接
串口连接
(1)打开MobaXterm工具,点击Session,然后选择Serial
(2)配置端口号,例如COM3,实际使用的串口号以PC识别到的串口号为准
(3)设置串口配置参数,如下:
波特率(Baud rate):921600
数据位(Data bits):8
奇偶校验(Parity):None
停止位(Stop bits):1
流控(Flow Control):无
(4)点击OK,输入用户名:root、密码:root 登录设备
有线网络配置
(1)打开MobaXterm工具,点击Session,然后选择SSH
(2)输入开发板IP地址,例如192.168.1.10
(3)选中specify username,输入root
(4)点击OK后,输入用户名(root)、密码(root)即可完成登录

VNC 连接(可选)
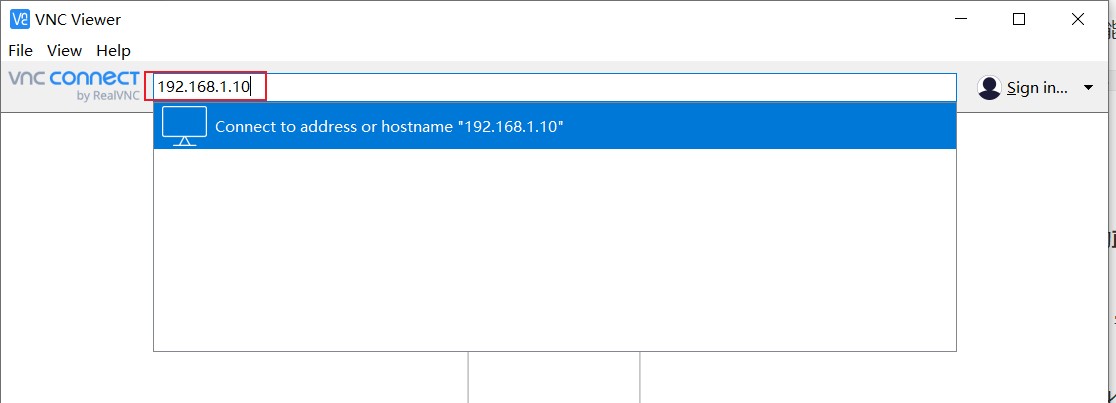
(1)输入设备ip地址,例如:192.168.1.10
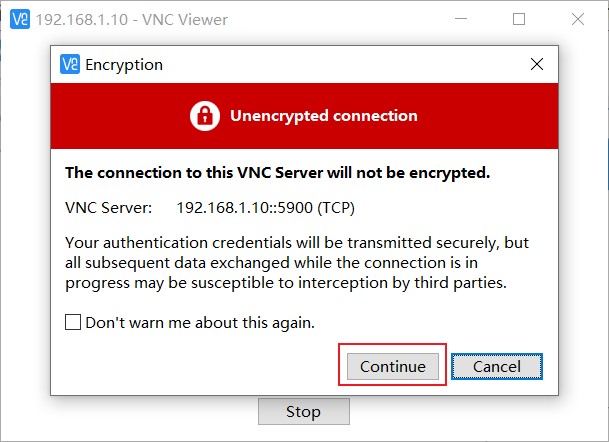
(2)输入IP地址后回车,弹出链接未加密的提示,点击 Continue
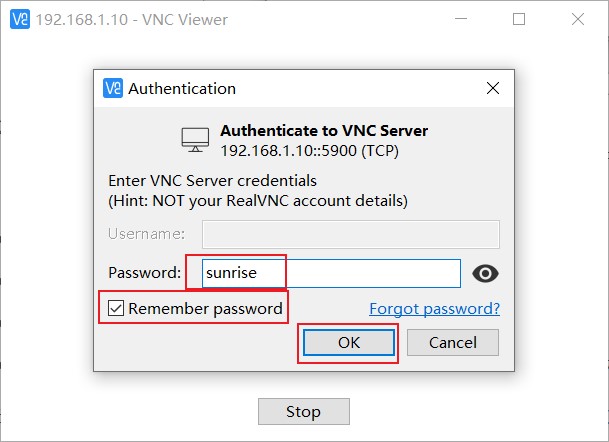
(3)输入密码 sunrise,勾选 Remember password, 点击 OK连接
步骤二:手势检测算法
NodeHub 链接:https://developer.horizon.cc/nodehubdetail/168958376283445760
手势控制算法启动
apt update
apt install tros-turtlesim
(1)启动手势控制方案
SSH:终端一
# 配置tros.b环境
source /opt/tros/setup.bash

# 从tros.b的安装路径中拷贝出运行示例需要的配置文件。
cp -r /opt/tros/lib/mono2d_body_detection/config/ .
cp -r /opt/tros/lib/hand_lmk_detection/config/ .
cp -r /opt/tros/lib/hand_gesture_detection/config/ .

# 配置MIPI摄像头
export CAM_TYPE=mipi

# 启动launch文件
ros2 launch gesture_control gesture_control.launch.py
(2)点击PC端浏览器,输入IP地址:192.168.1.10:8000,查阅手势控制效果
(3)启动仿生机器人
SSH:终端二
启动之前,需要修改Topic名称,加一个turtle1即可
vim /opt/tros/share/gesture_control/launch/gesture_control.launch.py
输入 i 进入编辑模式,加粗位置调整即可
def generate_launch_description():
    gesture_control_node = Node(
        package='gesture_control',
        executable='gesture_control',
        output='screen',
        parameters=[
            {"ai_msg_sub_topic_name": "/hobot_hand_gesture_detection"},
            {"twist_pub_topic_name": "turtle1/cmd_vel"},
按下 esc 推出编辑模式,输入wq! 回车后保存
source /opt/tros/setup.bash
ros2 run turtlesim turtlesim_node
竞速调整
vim /opt/tros/share/gesture_control/launch/gesture_control.launch.py
输入 i 进入编辑模式
def generate_launch_description():
    gesture_control_node = Node(
        package='gesture_control',
        executable='gesture_control',
        output='screen',
        parameters=[
            {"ai_msg_sub_topic_name": "/hobot_hand_gesture_detection"},
            {"twist_pub_topic_name": "turtle1/cmd_vel"},
            {"activate_wakeup_gesture": 0},
            {"track_serial_lost_num_thr": 100},
            {"move_step": 10.0},
            {"rotate_step": 5.0}
        ],
        arguments=['--ros-args', '--log-level', 'warn']
    )
按下 esc 推出编辑模式,输入wq! 回车后保存
ctrl+c关闭算法控制方案 重启算法控制指令,即可看到调整后效果
案例二:语音控制仿生机器人
步骤一 设备连接
参考案例一、设备连接
步骤二 语音控制机器人
NodeHub链接:https://developer.horizon.cc/nodehubdetail/168958376283445763
(1)启动语音控制
SSH:终端一
# 配置tros.b环境
source /opt/tros/setup.bash

# 从tros.b的安装路径中拷贝出运行示例需要的配置文件。
cp -r /opt/tros/lib/hobot_audio/config/ .

# 加载音频驱动,设备启动之后只需要加载一次
bash config/audio.sh

#启动launch文件
ros2 launch audio_control audio_control.launch.py
(2)运行虚拟端小乌龟
SSH:终端二
启动之前,需要修改Topic名称,加一个turtle1即可
vim /opt/tros/share/audio_control/launch/audio_control.launch.py
输入 i 进入编辑模式,加粗位置调整即可
        Node(
            package='audio_control',
            executable='audio_control',
            output='screen',
            parameters=[
                {"ai_msg_sub_topic_name": "/audio_smart"},
                {"twist_pub_topic_name": "turtle1/cmd_vel"},
按下 esc 推出编辑模式,输入wq! 回车后保存
source /opt/tros/setup.bash
ros2 run turtlesim turtlesim_node
竞速调整
vim /opt/tros/share/audio_control/launch/audio_control.launch.py
输入 i 进入编辑模式
def generate_launch_description():
    return LaunchDescription([
        # 启动智能语音识别pkg
        IncludeLaunchDescription(
            PythonLaunchDescriptionSource(
                os.path.join(
                    get_package_share_directory('hobot_audio'),
                    'launch/hobot_audio.launch.py')),
            launch_arguments={
                'audio_pub_topic_name': '/audio_smart'

            }.items()
        ),
        # 启动语音控制pkg
        Node(
            package='audio_control',
            executable='audio_control',
            output='screen',
            parameters=[
                {"ai_msg_sub_topic_name": "/audio_smart"},
                {"twist_pub_topic_name": "turtle1/cmd_vel"},
                {"move_step": 10.0 },
                {"rotate_step": 5.0},
                {"motion_duration_seconds": 3000}
            ],
            arguments=['--ros-args', '--log-level', 'error']
        )
按下 esc 推出编辑模式,输入wq! 回车后保存
ctrl+c关闭算法控制方案 重启算法控制指令,即可看到调整后效果
步骤三 人体检测(可选) (1)启动人体跟随
# 拷贝人体跟随的模型
cp -r /opt/tros/lib/mono2d_body_detection/config/ .

#启动Node
source /opt/tros/setup.bash

# 配置使用的相机接口,如使用usb相机,"mipi"改为"usb"
export CAM_TYPE=mipi

# 运行人体跟随
ros2 launch body_tracking body_tracking_without_gesture.launch.py

