RDK官方提供了2种手部关键点识别模型,分别适配X3/X5和S100/S600,手册链接如下:
X3/X5:手势识别 | RDKDOC
S100/S600:人手关键点及手势识别(mediapipe) | RDK DOC
也许是训练集数据影响,X3/X5模型效果在1-2米内的近距离效果较差,我们当然希望模型在不同距离能拥有相同的鲁棒性
MediaPipe的手部关键点识别模型是普遍广泛使用、业界认可度较高的开源模型,本文将展示如何将MediaPipe手部关键点模型面向X5量化。
一、环境要求
onnx模型产生、模型量化、模型测试依赖环境如下:
-
onnxruntime(onnx导出与测试使用)
-
tf2onnx(onnx导出使用)
-
RDK X5量化工具链环境(量化环境)
-
OpenCV/skimage(校准数据集、数据预处理使用)
-
以上环境的所有依赖
二、ONNX模型导出
X5工具链源模型支持Caffe模型和ONNX模型两种,但Caffe模型用的比较少,本文只介绍通过以ONNX为源模型格式的量化方式。
来到谷歌mediapipe识别官网手部特征点检测部分:hand_landmarker
模型下载链接:hand_landmarker.task
这是一个.task后缀的压缩包,直接把后缀改为zip解压,或者在命令行使用zip命令解压都可以,解压后内部文件如下:
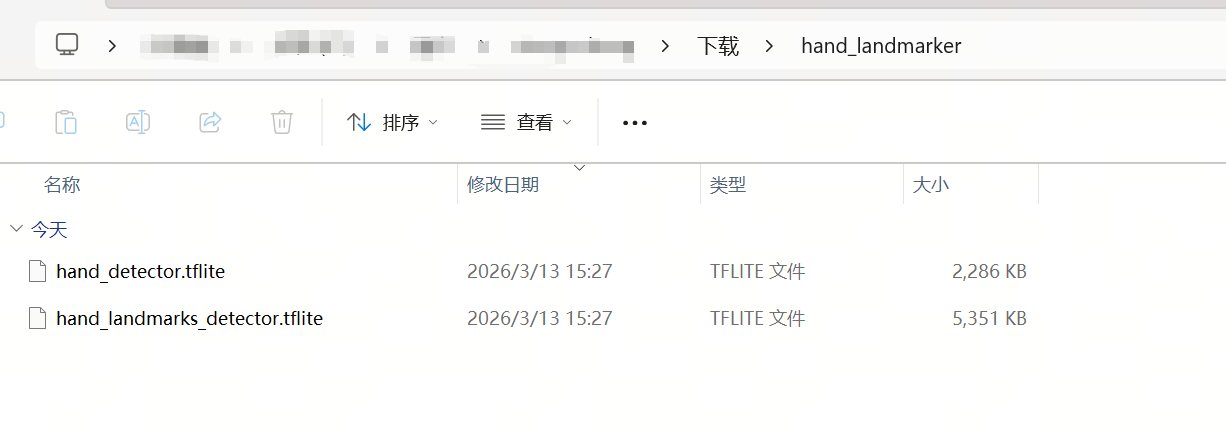
这是mediapipe手部关键点的两个重要模型:
-
hand_detector.tflite:
-
用于手掌检测
-
输入是
192x192x3的rgb图像,数值范围0.0f-1.0f -
输出是
2016x18大小的张量,可以处理2016若干个[矩形框,手掌关键点(用于正反手判断),置信度]数据组 -
格式是tensorflow导出的模型权重文件
-
-
hand_landmarks_detector.tflite:
-
用于手部关键点检测,通常是先用手掌检测模型检测图中的多手掌->截取roi并resize->手部关键点检测
-
输入是
224x224x3的rgb图像,数值范围0.0f-1.0f -
输出0:
1x63张量,为21个手部关键点的相机坐标系x,y,z坐标 -
输出1:
0.0f-1.0f的浮点标量,输入图像中包含手的置信度 -
输出2:
0.0f-1.0f的浮点标量,用于判断左右手 -
输出3:
1x63张量,为21个手部关键点的世界坐标系x,y,z坐标 -
格式是tensorflow导出的模型权重文件
-
使用tf2onnx工具将它们导出为onnx模型,注意指定opset11(X5工具链只支持opset11量化)
python -m tf2onnx.convert \
    --tflite ./hand_detector.tflite \
    --output ./palm_detection_mediapipe_opset11.onnx \
    --opset 11
python -m tf2onnx.convert \
    --tflite ./hand_landmarks_detector.tflite \
    --output ./hand_landmark_full_opset11.onnx \
    --opset 11
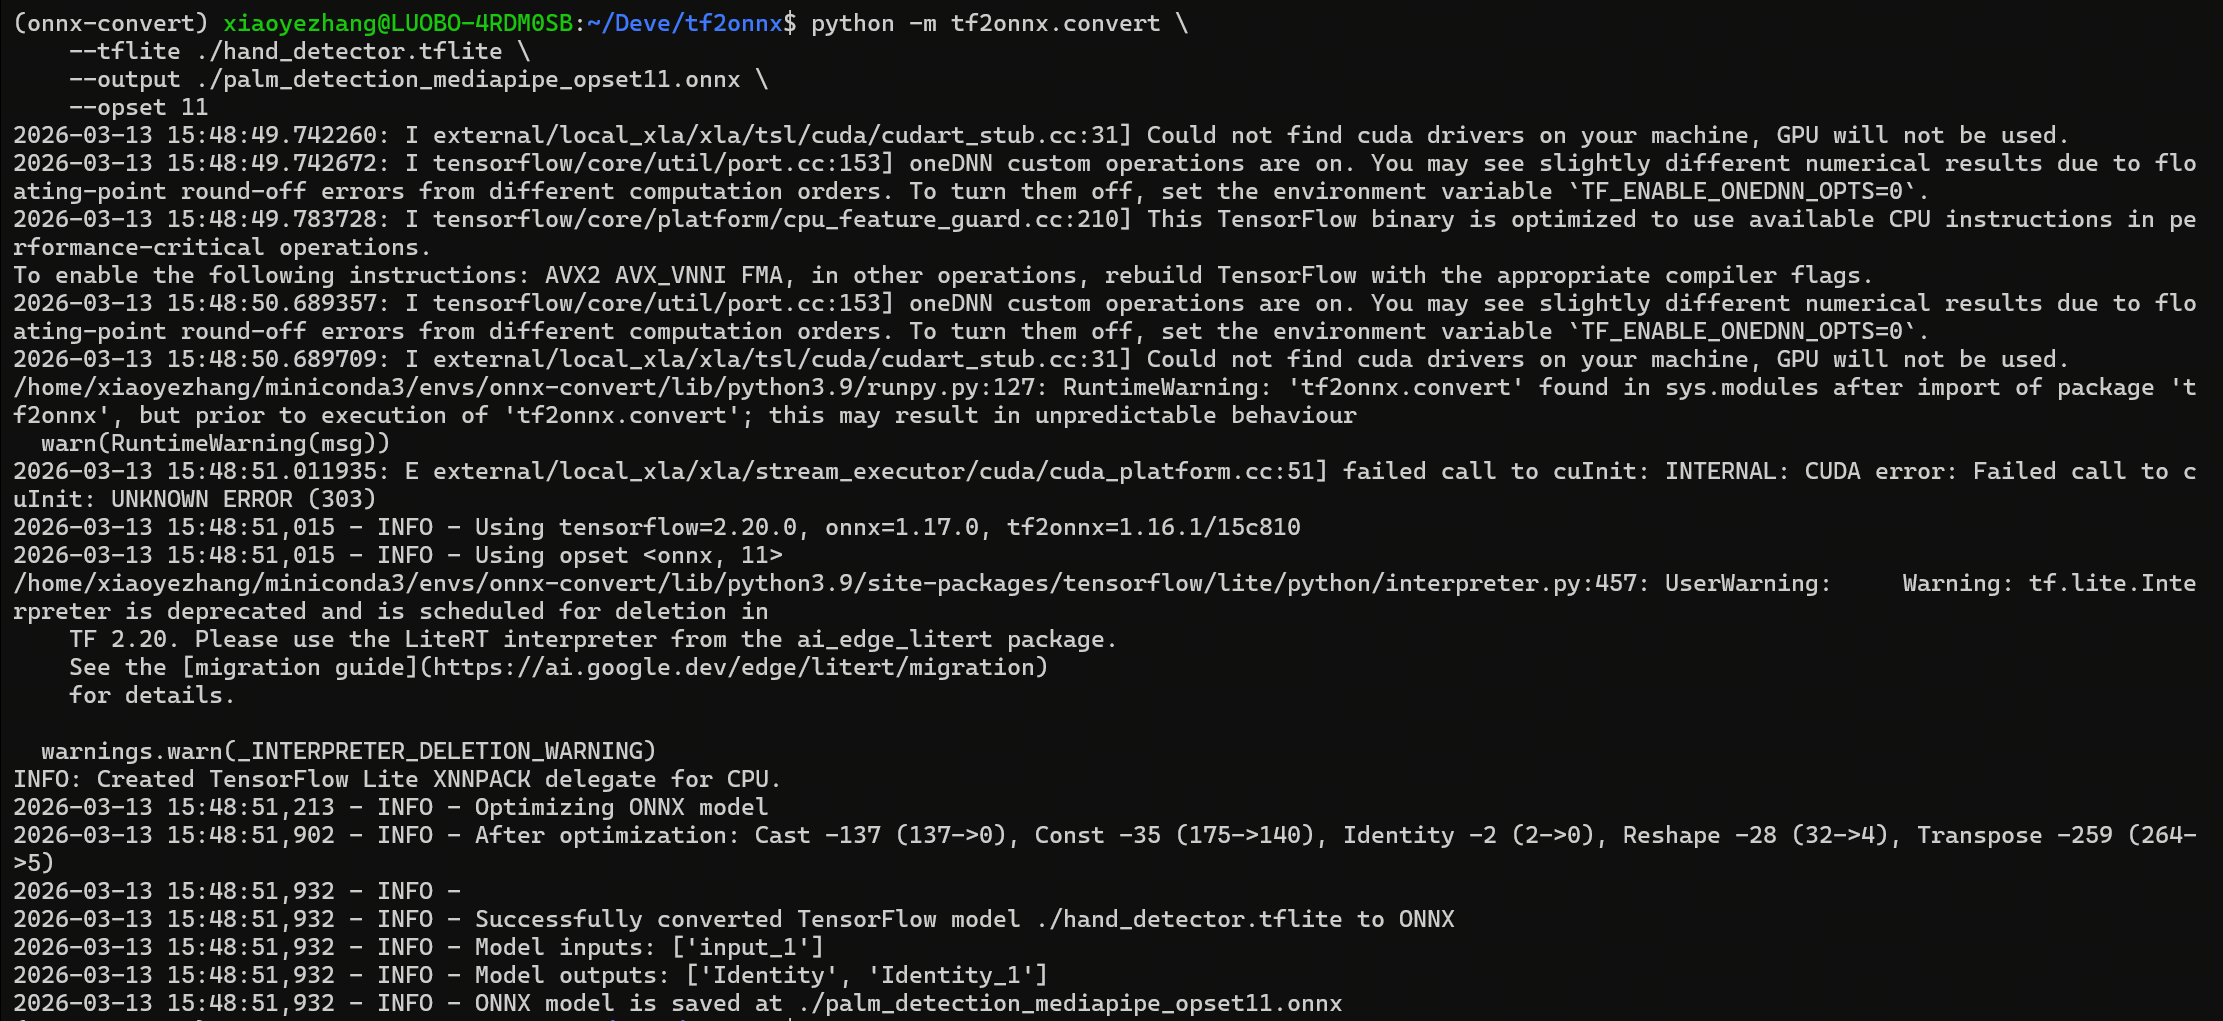
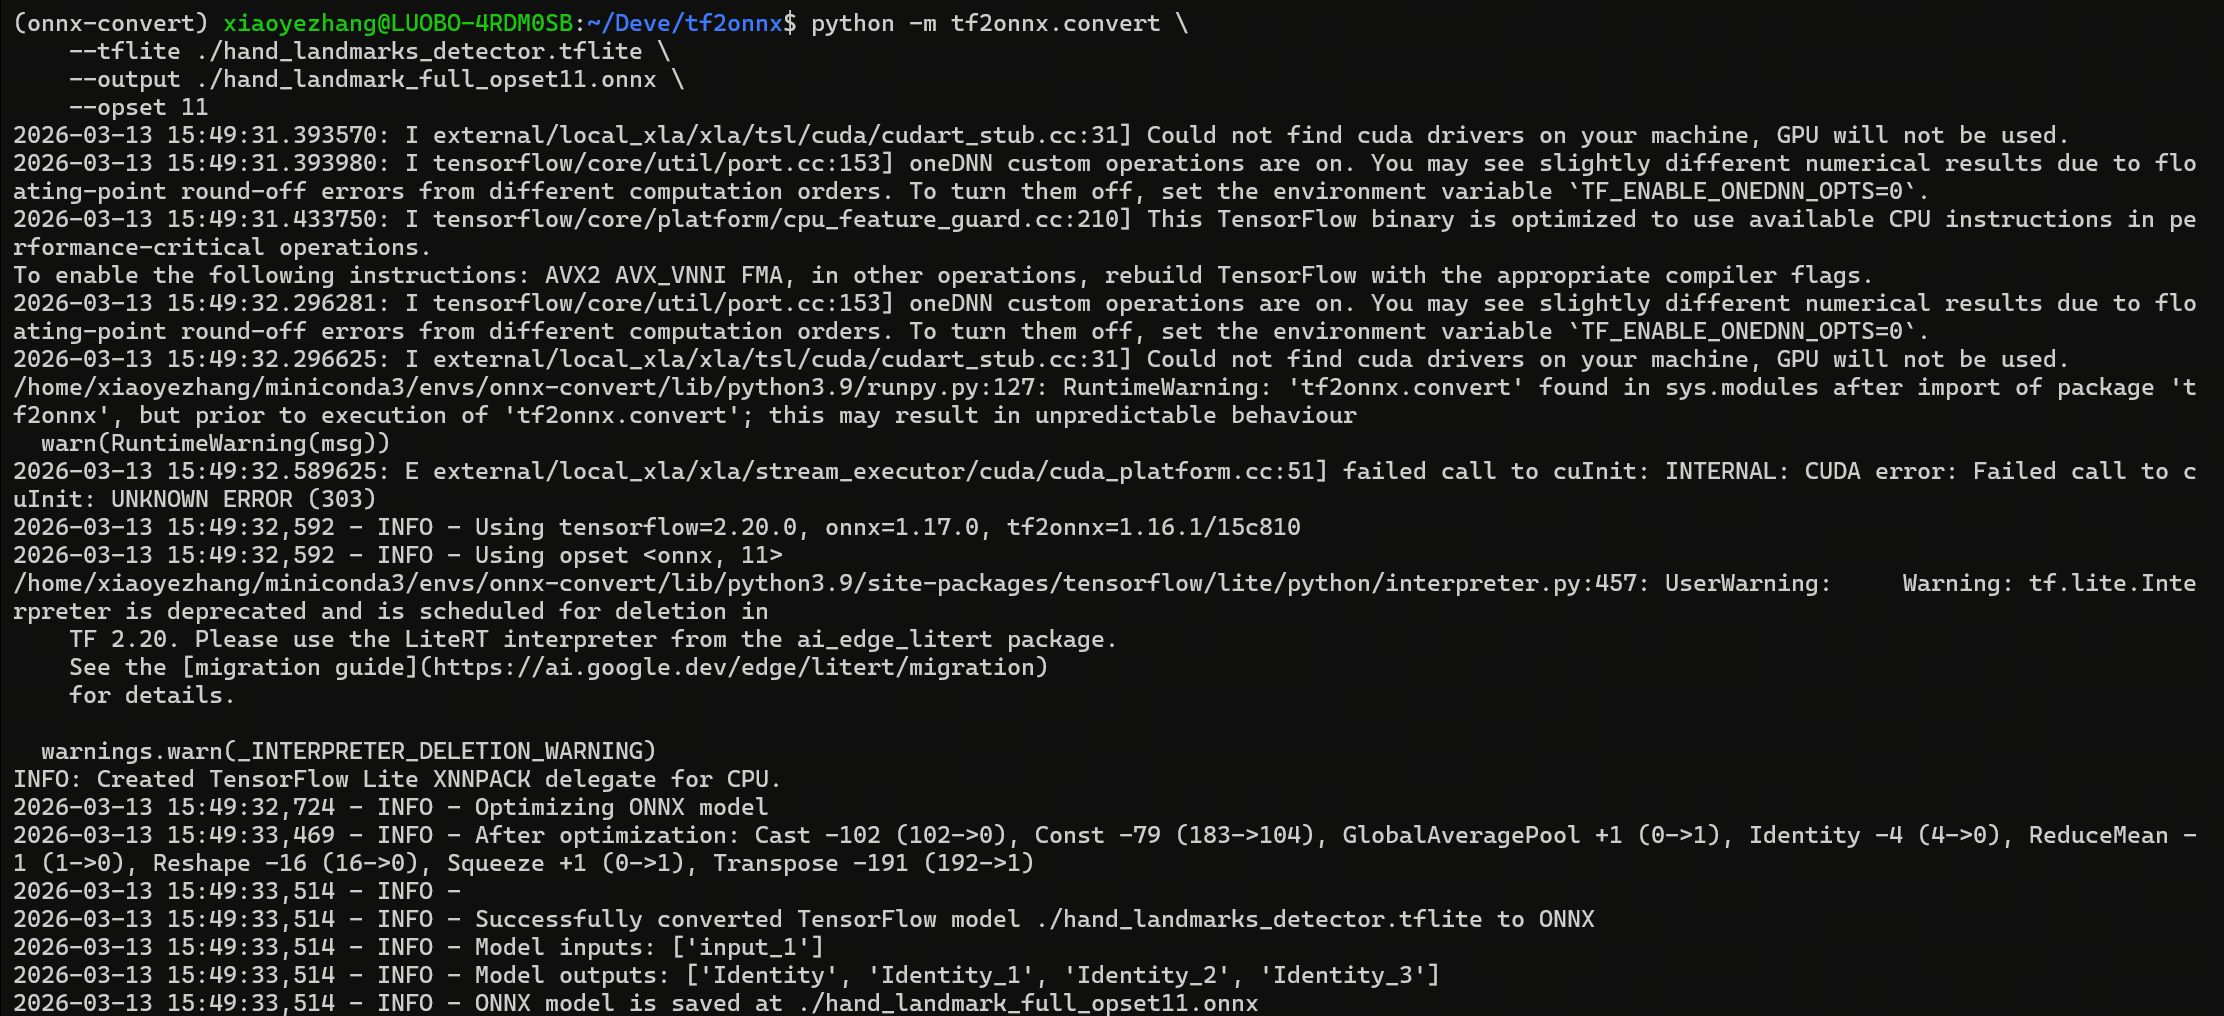
完成后目录下应该多出了2个onnx模型,把它们转移到量化的工作目录中。
三、校准数据产生
校准数据必须是符合量化中间模型输入格式的二进制数据模型,接下来介绍如何产生校准数据
3.1.准备原始图片
准备100张原模型训练图片,以常用图片格式png/jpg保存都可以
mediapipe训练集抽样可以自己到互联网找一下,这边不提供了
3.2.校准数据格式确认
需要确认3方面格式:
-
数据排列方式:模型的输入同步,仅支持
NCHW和NHWC,这边两个模型的输入分别是192x192x3和224x224x3,向左补上一个batch维度后分别是1x192x192x3和1x224x224x3,显然是NHWC -
数据范围:这块稍微有点复杂,校准数据的数据范围经稍后yaml配置的偏移和缩放后要与原onnx模型的范围一致,由于我们需求的输入是nv12数据,它是整型的,数据范围在0-255,所以校准数据的数据范围也必须在0-255,但是为了适配浮点模型的量化,他又必须是float格式
-
色彩通道排列:与原模型一致,保存rgb即可(注意opencv读图默认是bgr,生成校准数据时要转换一下)
所以我们校准数据的格式确定了:NHWC排列的0-255浮点型rgb图像
3.3.校准数据转换
使用以下脚本,将png/jpg格式的图片批量转换为NHWC排列,数据范围0-255.0f,且色彩通道顺序为rgb的无损二进制图像raw文件:
import os
import cv2
import numpy as np
from pathlib import Path

def convert_image(src_image, dst_dir, target_size=(192, 192), to_bgr=False):
    # 1. 读取图像(OpenCV 默认 BGR)
    img = cv2.imread(src_image, cv2.IMREAD_UNCHANGED)
    if img is None:
        print(f"警告:无法读取图片 {src_image},跳过")
        return

    # 2. 统一转为 3 通道
    if len(img.shape) != 3:
        continue

    # 3. 调整尺寸
    img = cv2.resize(img, target_size, interpolation=cv2.INTER_LINEAR)

    # 4. 转换颜色空间(False 表示输出 RGB)
    if not to_bgr:
        img = cv2.cvtColor(img, cv2.COLOR_BGR2RGB)

    # 5. 转为 float32
    img = img.astype(np.float32)

    # 6. 添加 batch 维度并保存为 raw 二进制
    save_path = os.path.join(dst_dir, Path(src_image).stem + '.raw')
    os.makedirs(os.path.dirname(save_path), exist_ok=True)
    img_batch = img[np.newaxis, ...]  # shape (1, 192, 192, 3)
    img_batch.tofile(save_path)       # 纯二进制,无头部
    print(f"已保存 raw: {save_path},形状 {img_batch.shape}")

def list_images(folder):
    valid_exts = ('.jpg', '.jpeg', '.png', '.bmp', '.tiff')
    return [os.path.join(folder, f) for f in os.listdir(folder)
            if f.lower().endswith(valid_exts)]

if __name__ == '__main__':
    dst_dir = # 替换为校准数据输出目录路径
    image_dir = # 替换为校准数据源目录目录
    target_size = (224, 224) # 手掌检测为(192, 192),关键点检测为(224, 244)
    to_bgr = False   # 不输出BGR,而是RGB

    images = list_images(image_dir)
    if not images:
        print(f"在 {image_dir} 中未找到图片")
        exit(1)

    print(f"找到 {len(images)} 张图片,开始处理...")
    for img_path in images:
        convert_image(img_path, dst_dir, target_size, to_bgr)
    print("所有图片处理完成!")
替换对应路径和尺寸信息,执行脚本,应该会得到诸如下图的数据
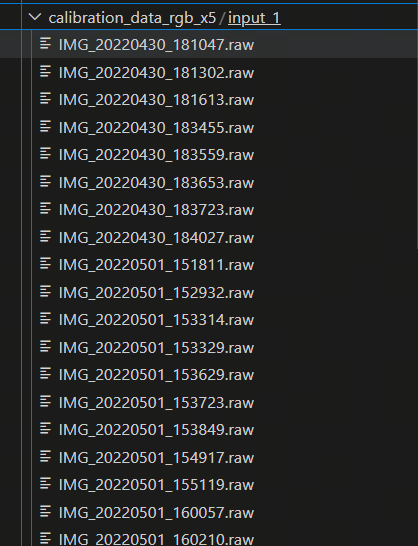
至此,校准数据准备完成
四、量化运行
4.1.准备量化所需的yaml参数文件
手掌检测yaml文件如下,重要参数已注释说明
  model_parameters:
    # 原始Onnx浮点模型文件
    onnx_model: 'palm_detection_mediapipe_opset11.onnx'
    # 输出模型文件名(不包括.bin)
    output_model_file_prefix: 'palm_det_192_192'
    # 输出目录
    working_dir: './model_output_x5'

    march: 'bayes-e'

  input_parameters:
    # 原始onnx模型的输入节点名称
    input_name: "input_1"
    # 原始onnx模型输入色彩通道顺序
    input_type_train: 'rgb'
    # 原始onnx模型的输入数据排布
    input_layout_train: 'NHWC'
    # 原始onnx模型的输入数据尺寸
    input_shape: '1x192x192x3'

    input_batch: 1

    # 量化模型包装的预处理方法:缩放
    norm_type: 'data_scale'
    # 缩放比例=1/255
    scale_value: '0.00392156862745098'

    # 转换后的输入数据格式:nv12
    input_type_rt: 'nv12'

  calibration_parameters:
    # 校准数据路径
    cal_data_dir: 'calibration_data_rgb_x5/input_1'

    cal_data_type: 'float32'
    calibration_type: 'default'
    optimization: set_model_output_int16

  compiler_parameters:
    compile_mode: 'latency'
    debug: False
    core_num: 1
    optimize_level: 'O3'
手部关键点检测yaml文件如下,重要参数已说明:
  model_parameters:
    # 原始Onnx浮点模型文件
    onnx_model: 'hand_landmark_full_opset11.onnx'
    # 输出模型文件名(不包括.bin)
    output_model_file_prefix: 'hand_224_224'
    # 输出目录
    working_dir: './model_output_x5'

    march: 'bayes-e'

  input_parameters:
    # 原始onnx模型的输入节点名称
    input_name: "input_1"
    # 原始onnx模型输入色彩通道顺序
    input_type_train: 'rgb'
    # 原始onnx模型的输入数据排布
    input_layout_train: 'NHWC'
    # 原始onnx模型的输入数据尺寸
    input_shape: '1x224x224x3'

    input_batch: 1

    # 量化模型包装的预处理方法:缩放
    norm_type: 'data_scale'
    # 缩放比例=1/255
    scale_value: '0.00392156862745098'

    # 转换后的输入数据格式:nv12
    input_type_rt: 'nv12'

  calibration_parameters:
    # 校准数据路径
    cal_data_dir: 'calibration_data_rgb_x5/input_1'

    cal_data_type: 'float32'
    calibration_type: 'default'
    optimization: set_model_output_int16

  compiler_parameters:
    compile_mode: 'latency'
    debug: False
    core_num: 1
    optimize_level: 'O3'

    # 指定输入源为resizer
    input_source: {"input_1": "resizer"}
4.2.启动量化
使用以下命令可以启动量化
hb_mapper makertbin --config conf_x5.yaml --model-type onnx
4.3.量化结果
手掌检测模型量化精度数据如下:
=============================================================================
Output      Cosine Similarity  L1 Distance  L2 Distance  Chebyshev Distance
-----------------------------------------------------------------------------
Identity    0.990005           2.211411     0.015992     16.641747
Identity_1  0.996859           0.724158     0.020574     3.100387
手部关键点模型量化精度数据如下
=============================================================================
Output      Cosine Similarity  L1 Distance  L2 Distance  Chebyshev Distance
-----------------------------------------------------------------------------
Identity    0.999030           3.263987     0.512803     8.718201
Identity_1  1.000000           0.002861     0.002861     0.002861
Identity_2  1.000000           0.122190     0.122190     0.122190
Identity_3  0.922014           0.005847     0.000955     0.027674
余弦相似度在0.99以上基本证明量化成功了,手部关键点模型的Identity_3输出头我们不使用,这个输出头本身也有问题,所以可以不管它
4.4.量化模型测试
使用量化输出目录下的xxx_quantized_model.onnx模型进行推理,其精度是和.bin模型一样的,用于在PC端快速验证量化结果
在工具链环境使用以下脚本验证手掌检测效果:
import copy
import numpy as np
import cv2
from pathlib import Path
from anchor import _load_anchors
from horizon_tc_ui import HB_ONNXRuntime as HBRuntime

def bgr_to_nv12(bgr_img):
    # 转换为 YUV_I420 (YUV420P)
    yuv_i420 = cv2.cvtColor(bgr_img, cv2.COLOR_BGR2YUV_I420)
    h, w = bgr_img.shape[:2]

    y_plane = yuv_i420[:h]

    u_plane = yuv_i420[h : h + h // 4].reshape(-1, w // 2)
    v_plane = yuv_i420[h + h // 4 :].reshape(-1, w // 2)

    uv_plane = np.stack((u_plane, v_plane)).transpose(1, 2, 0)
    # uv_plane = uv_plane.reshape(-1, w // 2, 2)

    # uv_plane = np.zeros((h // 2, w // 2, 2), dtype=np.uint8)
    # uv_plane[..., 0] = u_plane  # U channel
    # uv_plane[..., 1] = v_plane  # V channel

    return y_plane, uv_plane

sess = HBRuntime("./model_output_x5/palm_det_192_192_quantized_model.onnx")

input_names = sess.input_names
output_names = sess.output_names

ori_image = cv2.imread('./2.png')
original_shape = ori_image.shape

image = copy.deepcopy(ori_image)
image = cv2.resize(image, (192, 192))
# image = cv2.cvtColor(image, cv2.COLOR_BGR2RGB).astype(np.float32) / 255.0
image = cv2.cvtColor(image, cv2.COLOR_BGR2YUV)

outputs = sess.run(output_names, {input_names[0]: image[np.newaxis, ...]})

anchors = _load_anchors()

score = outputs[1][0, :, 0]
box_delta = outputs[0][0, :, 0:4]
landmark_delta = outputs[0][0, :, 4:]
scale_x = original_shape[1]
scale_y = original_shape[0]
scale = np.array([scale_x, scale_y])

# get scores
score = score.astype(np.float64)
score = 1 / (1 + np.exp(-score))

# get boxes
cxy_delta = box_delta[:, :2] / 192
wh_delta = box_delta[:, 2:] / 192
xy1 = (cxy_delta - wh_delta / 2 + anchors) * scale
xy2 = (cxy_delta + wh_delta / 2 + anchors) * scale
boxes = np.concatenate([xy1, xy2], axis=1)
keep_idx = cv2.dnn.NMSBoxes(boxes, score, 0.5, 0.75, top_k=10)
if len(keep_idx) == 0:
    breakpoint()
score = score[keep_idx]
boxes = boxes[keep_idx]

# get landmarks
selected_landmarks = landmark_delta[keep_idx].reshape(-1, 7, 2)
selected_landmarks = selected_landmarks / 192
selected_anchors = anchors[keep_idx]
for idx, landmark in enumerate(selected_landmarks):
    landmark += selected_anchors[idx]
selected_landmarks *= scale

for i, palm in enumerate(boxes):
    if score[i] > 0.5:
        x1, y1, x2, y2 = palm[0:4]
        print(f"Palm {i}: Score={score[i]:.4f}, Box=({x1:.1f}, {y1:.1f}, {x2:.1f}, {y2:.1f})")
        cv2.rectangle(ori_image, (int(x1), int(y1)), (int(x2), int(y2)), (0, 255, 0), 2)
        for j, landmark in enumerate(selected_landmarks[i]):
            x, y = landmark
            cv2.circle(ori_image, (int(x), int(y)), 3, (255, 0, 0), -1)
            cv2.putText(ori_image, str(j), (int(x), int(y)), cv2.FONT_HERSHEY_SIMPLEX, 0.5, (0, 0, 255), 1, cv2.LINE_AA)

# 保存图片
cv2.imwrite("./output_image.png", ori_image)
左图为量化前,右图为量化后
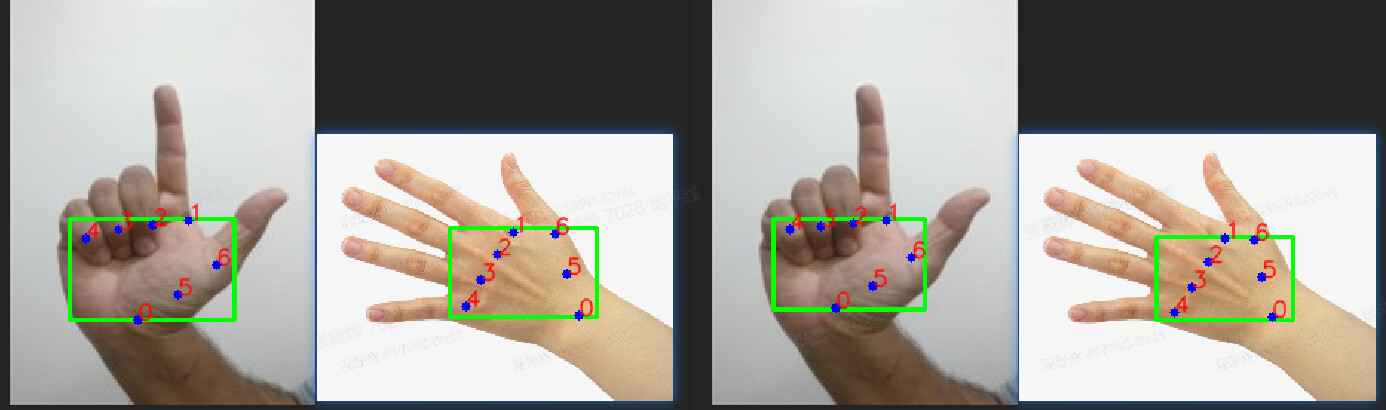
在工具链环境使用以下脚本验证手部关键点识别效果:
import numpy as np
import cv2
import copy
from pathlib import Path
# 加载地平线依赖库
from horizon_tc_ui import HB_ONNXRuntime as HBRuntime

def bgr_to_nv12(bgr_img):
    # 转换为 YUV_I420 (YUV420P)
    yuv_i420 = cv2.cvtColor(bgr_img, cv2.COLOR_BGR2YUV_I420)
    h, w = bgr_img.shape[:2]

    y_plane = yuv_i420[:h]

    u_plane = yuv_i420[h : h + h // 4].reshape(-1, w // 2)
    v_plane = yuv_i420[h + h // 4 :].reshape(-1, w // 2)

    uv_plane = np.stack((u_plane, v_plane)).transpose(1, 2, 0)

    return y_plane, uv_plane

# sess = HBRuntime("./model_output_x5/hand_224_224_original_float_model.onnx")
sess = HBRuntime("./model_output_x5/hand_224_224_quantized_model.onnx")

input_names = sess.input_names
output_names = sess.output_names

ori_image = cv2.imread('./p5.png')
original_shape = ori_image.shape

image = copy.deepcopy(ori_image)
image = cv2.resize(image, (224, 224))
# image = cv2.cvtColor(image, cv2.COLOR_BGR2RGB).astype(np.float32) / 255.0
image = cv2.cvtColor(image, cv2.COLOR_BGR2YUV)

output = sess.run(output_names, {input_names[0]: image[np.newaxis, ...]})

# if suffix == '.onnx':
#     image = cv2.cvtColor(image, cv2.COLOR_BGR2RGB)
#     image = image.astype(np.float32) / 255
# elif suffix == '.hbm' or suffix == '.bc':
#     scale = 1/255
#     zero_point = -128

#     image = image.astype(np.float32) / 255
    # image = np.round(image / scale + zero_point).astype(np.int8)
    # image = image.astype(np.float32) - 128
    # image = image.astype(np.int8)

# input = np.load('kps/aircanvas/calibration_data_bgr_s100/input_1/IMG_20220430_181047.npy')

keypoints = output[0].reshape(-1, 3)
score = output[1][0][0]

score2 = output[2][0][0]

print(f'{score=},{score2=}')

# 在原始图片上绘制关键点
for i, (x, y, z) in enumerate(keypoints):
    x = int(x * ori_image.shape[1] / 224)
    y = int(y * ori_image.shape[0] / 224)
    cv2.circle(ori_image, (x, y), 5, (0, 255, 0), -1)
    cv2.putText(ori_image, str(i), (x, y), cv2.FONT_HERSHEY_SIMPLEX, 0.5, (0, 0, 255), 1, cv2.LINE_AA)

# 保存图片
cv2.imwrite("./output_5_.png", ori_image)
左图为量化前,右图为量化后
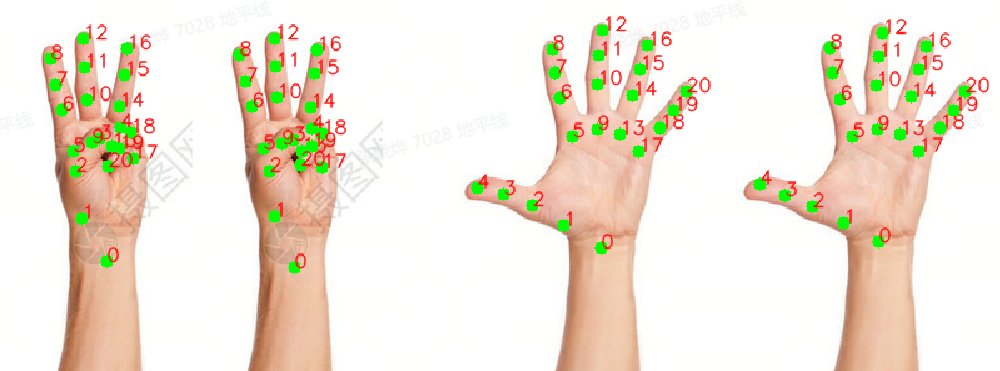
五、常见问题
在量化过程中有许多操作失误会导致量化精度不佳,本次量化初期也遇到类似问题,验证量化效果时,输出的检测框坐标如下:
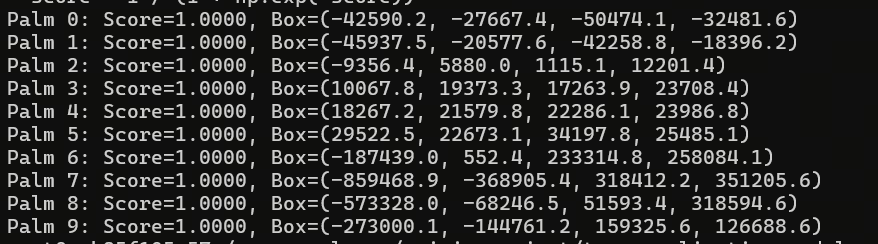
这已经与精度问题无关了,是输入数据的格式与归一化验证错误导致的数据范围严重离散
排查过后发现是产生校准数据集时,存储的图片范围是0.0f-1.0f,而yaml配置中的缩放系数依然是1/255,也就是说,在量化过程中,模型将1.0f范围的图像再次缩放了255倍,形成了数据范围在0-1/255的数据给量化做校准,这样的数据对于模型来说就几乎是全黑的,自然无法起到校准效果
由于需要适配8位的nv12数据(数据范围0-255),yaml中的缩放系数不能改变,将校准数据集的数据范围还原扩大的0-255后再次量化,就解决问题了
其他量化问题可以参考手册: 7.4 算法工具链开发指南 | RDK DOC
六、上板运行
手部关键点的pipeline比较复杂,这里不赘述,具体模型的上板运行可以参考手册:hand_lmk_gesture_mediapipe,该仓库之后也会适配X5
七、总结
至此,我们经过了ONNX模型准备、校准数据准备、量化yaml配置、量化执行、量化结果分析等步骤,完成了mediapipe模型到X5的量化部署
八、资源汇总
原生模型:
hand_landmarker.task.zip (7.5 MB)
转换为opset 11的onnx模型:
hand_landmarker_onnx_opset11.zip (7.4 MB)
校准数据集png格式:
test_images.zip (1.1 MB)